 |
|
|
 |
|
|
|
Build a Barn Door Tracker
Latitude Wedge
However, I was concerned about balance and stability. Also, a good tripod head is expensive. So I constructed my own latitude wedge. It is custom-designed for my latitude (approximately 43° north) but has enough adjustment to compensate for modest changes in location. It provides a very stable base for the mount.
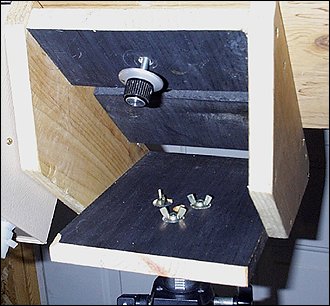
Fortunately, the top of the tripod features a round metal plate with three threaded holes. The threaded holes have a 6mm metric thread, so I inserted a 6mm x 30mm screw in each hole from below. The latitude wedge is placed over these three screws and held firmly in place with wing nuts.
The base board of the mount attaches to the wedge via a hinged wooden plate at the lower end and an adjustable spring-loaded screw at the upper end. Turning the adjustment knob provides fine tuning of the mount's latitude angle, which is helpful for polar alignment. Here's a close-up picture of the adjustment mechanism.
When setting up the mount for a photo session, the latitude adjustment knob is first set to its mid-range. Then the tripod legs are adjusted to make the bottom of the latitude wedge roughly level. While viewing through the finder scope, the entire tripod is carefully moved in azimuth and the latitude screw adjusted until the mount is pointed at the celestial pole.
The celestial pole is located about ¾° from Polaris, so best results require consulting a chart to place the crosshairs of the finder scope as close as possible to the pole. I use SkyMap Pro to print a detailed finder chart of the region around the pole that matches the view in the finder scope. This is even more important in the southern hemisphere, where there is no convenient bright star close to the pole.
Because the weight of the camera causes some flexure in the whole assembly, polar alignment must be performed after the camera is mounted. Each time the camera is re-pointed to a new part of the sky, and anytime the lens is changed, polar alignment must be re-checked and adjusted if necessary.
| ||||||||||||||||||||||||||||||||||||||||||||||||||||||||||||||||||||||||||||||||||||||||||||||||||||||||||||||||||||||||||||||||||||||||||||||||||||||||||||||||||||||||||||||||||||||||||||||||||||||||||||||||||||||||||||||||||