 |
|
|
 |
|
|
|
Homemade Eyepieces
Make My Own Eyepieces?
The beauty of Chuck's method is that no lathe is required – only a table saw and a drill press. In a pinch, you could make the eyepieces with only a drill press by using a hand saw to cut and shape the wood housings. I already had a drill press and had been looking for an excuse to purchase a small table saw. Soon, an inexpensive Craftsman table saw found a place in my garage workshop.
I am a relatively inexperienced woodworker, so I began experimenting with scrap pine lumber to learn how to rip it into the octagonal shape suggested by Chuck in his article. It turned out to be relatively easy.
Chuck recommended using walnut for the eyepiece housings. After failing to find the recommended walnut stock locally, I found Woodcraft on the web. They sold me a small quantity of 2" × 2" walnut in 30" lengths.
To help you select lenses for making your own eyepieces, I have prepared two Eyepiece Focal Length Calculators. There are both online and downloadable versions of the calculators.
A trip to a local hobby store turned up styrene plastic for spacers and thin plywood for retaining rings. Careful bidding on eBay yielded an inexpensive set of Forstner drill bits for boring out the wood housings.
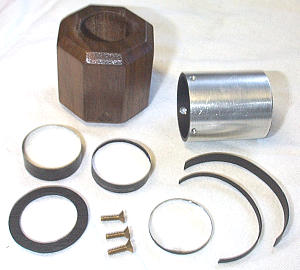
When the 2" × 2" walnut stock arrived, I used the table saw to rip it into an octagonal shape, measuring 1.625" between opposing faces. I measured the lenses, spacers, and retaining rings, and calculated the required length of each eyepiece housing. Then I cut off segments of the octagonal stock to the required lengths.
The most difficult part of this project is to accurately bore out the housing. You must bore three different diameters. The three borings must be concentric and centered in the housing, and each must be bored to the correct depth. If your woodworking experience and equipment are similar to mine, expect to make some mistakes.
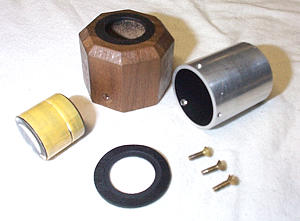
I have prepared some construction illustrations showing the sequence of steps involved in boring out a housing and illustrating how the components fit together. Since your lenses will probably not have the same physical dimensions as mine, there is no point in my providing exact measurements; you must determine them for yourself once you have all of your components in hand.
I then made the housing for the 19mm Erfle, and after one very silly measuring mistake, I created a near-perfect housing on the second try. The old rule of "measure twice, cut once" must have been created just for me.
I found it very helpful to make a simple jig for holding the eyepiece housings in place while drilling. Here are some photos of the jig.
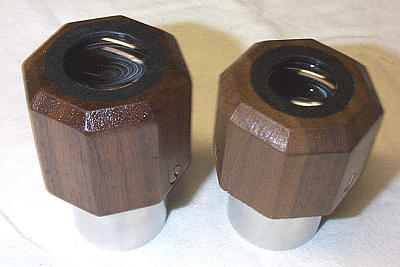
Once I had bored housings, it was time to make them look pretty. Using a sanding drum in the drill press, I chamfered the corners of the housings, then used sandpaper to further soften the edges by hand. Each housing was finished with two coats of clear spray-on polyurethane, with a light sanding between coats. I used flat black paint to make a glare-reducing annulus around each eye hole, as suggested in Chucks' article.
And the Verdict Is ...
The 23mm has a true field of more than 1.4° and is similarly sharp until you reach the outer third of the field. Its eye relief is perfect for me while wearing my eyeglasses. It makes a nice star hopping eyepiece, though I won't be giving up my 30mm Celestron Ultima. The 23mm will be a fine eyepiece for public observing sessions.
I am delighted with these eyepieces. With nothing but these two eyepieces and a 2x Barlow, I could spend many happy nights under the stars. And you can't beat the feeling of accomplishment that comes from creating something useful with your own two hands.
Thanks to Chuck Hards for an inspiring article.
| ||||||||||||||||||||||||||||||||||||||||||||||||||||||||||||||||||||||||||||||||||||||||||||||||||||||||||||||||||||||||||||||||||||||||||||||||||||||||||||||||||||||||||||||||||||||||||||||||||||||||||||||||||||||||||||||||||||||||||||||||||||||||||||||||||||||||||||||||||||||||||||


