CG-5
hard wood tripod
By Paweł Łańcucki, Pawel.Lancucki@pl.ibm.com
I use CG-5 mount from
Celestron for about one year. After fixing initial problems with poor
mechanical performance due to stiff grease and bad surfaces finish (see details
on the AstronomyBoy web page), the mount proved quite useful with a range of
telescopes, including 90mm f/11 achromatic refractor, 170mm f/7 Newtonian and
100mm f/10 Maksutov.
However, there was still a
number of things which remained annoying with the mount, the worst being the
poor aluminium tripod, which – while adequate for my small Mak, did not support
properly the heavier Newtonian.
After some considerations
and planning, I decided to adapt a heavy-duty hardwood tripod for my mount.
Ready made hard wood tripod – a bargain
My initial idea was quite
similar to many others – just replace the aluminium legs with ones made from
hard wood – preferably high quality oak. Then, while dropping to a local photo
exchange, I noticed an old theodolite tripod. Theodolites are devices used by
geologists, geodesists and civil engineers to accurately measure distances and
angles in the field. Although the theodolite head (the measuring device)
weights only around 10 kg, the tripod must be very heavy and stable, because it
must support device used to measure minute angles, in order of single arc
seconds. Sounds familiar? The tripod I found was made from aluminium and
hardwood, with three heavy, full thickness and regulated length legs connected
by a triangular central hub. It looked solid. I set it up just by spreading the
legs and tried to put all my weight on the tripod (100 kg). I could not detect
any flexure or wobble. Well, this was a bargain. It was mine for just below
$50.
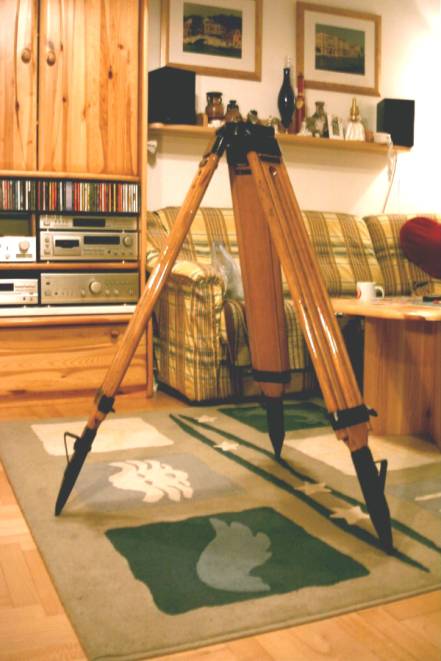
At home, I inspected the
tripod thoroughly. It had no technical flaws, just a lot of traces of wear and
tear and a lot of dirt, so I decided to dismantle and clean it. Old paint was
removed from all wooden parts using chemical solvent and a lot of sand paper,
than they were treated with a polyurethane primer and two layers of clear
marine-grade finish. All steel and aluminium parts were also cleaned and painted
with a primer and two layers of anti-corrosive black paint (Hamerite made in
UK). Well, it started to look good:
Adapting for CG-5
Having the tripod done, I
had to decide how to attach the mount head. I have purchased a pier adapter for
GP mounts from Orion Optics UK (www.orionoptics.co.uk). GP and CG-5 mount heads
fit this adapter in the same way they fit the central hub on the original
aluminium tripod. The first adapter get lost in the mail, but Orion Optics
promptly issued another one, which I received two weeks later. To mount adapter
to the tripod head, I used two triangles, each made of two layers of 15mm
plywood glued together with water-proof carpenter’s glue. Upper triangle is
slightly larger than the tripod head – just large enough to securely catch
metal L brackets holding the GP adapter. Lower triangle must be smaller to fit
under the tripod head, between the legs. Both triangles are coupled together
using three 80mm M8 bolts, with the tripod head / central hub squeezed between
them.
GP adapter is attached to
the upper triangle using six 40mm M6 bolts with heads locking in the wood.
Using carpenter’s 20mm bore, I made six holes 4 mm deep to capture bolt heads within
the thickness of the upper triangle. Three aluminium L brackets were cut from
30 x 30 angle stock with 3 mm walls. Top corners were cut-off and all corners
and cuts were sanded and polished with a high-number sand paper.
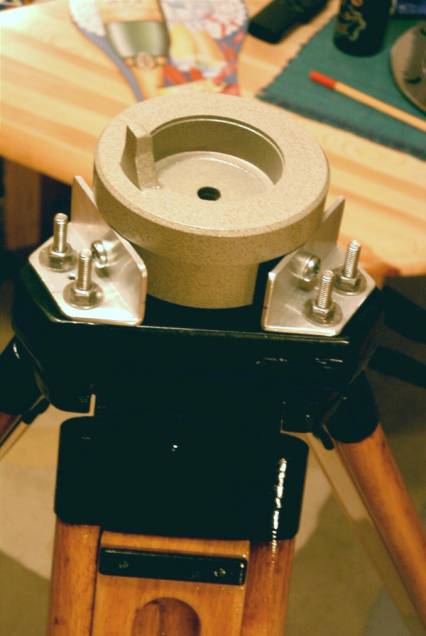
Because the L brackets are
angled to each other, they form a very stiff coupling between the GP adapter
and the upper triangle. Obviously, thicker walls would be even better. In my
case there was a 3mm gap between the adapter and upper triangle due to the size
of available L stock, so I have put a large O-ring made from hard rubber in it
to even better couple the two elements and to better transfer vibrations down
to the ground. Finally, I attached a hand knob to a 120mm M10 bolt, which holds
the mount head in the adapter. All bolts, nuts and washers are stainless steel
to avoid corrosion.
In total, it took some 6
evenings of work, of course the duration of the entire project was longer (some
4 weeks) because I had to wait for many layers of paint to dry.
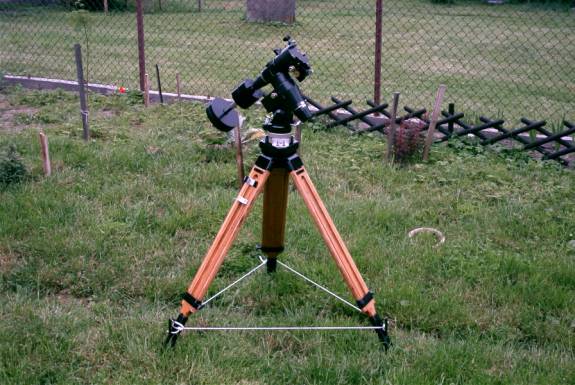
After a quick test in the
field I noticed that I need to hold the legs together – especially if setting
the tripod on a smooth surface like tiles on concrete – the solution was to
connect the legs with 3 meters of a strong string.
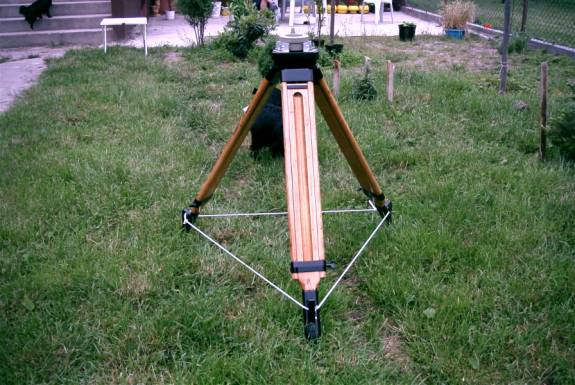
Some more pictures from the
field tests are shown below.
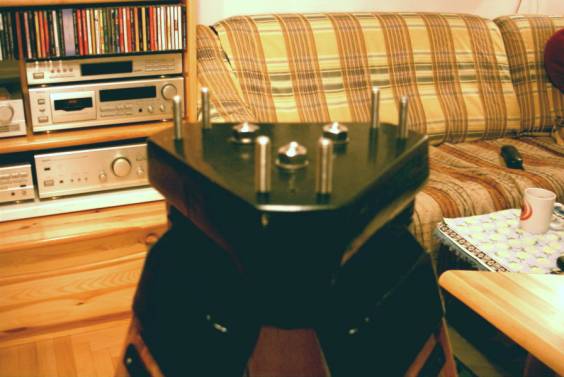
CG-5 equatorial head placed
on the tripod, counterweight shaft attached, standard 5 kg (11 lbs) and two
custom-made 2.5 kg counterweights to balance my heavy 7 inch f/7 Newtonian
scope:
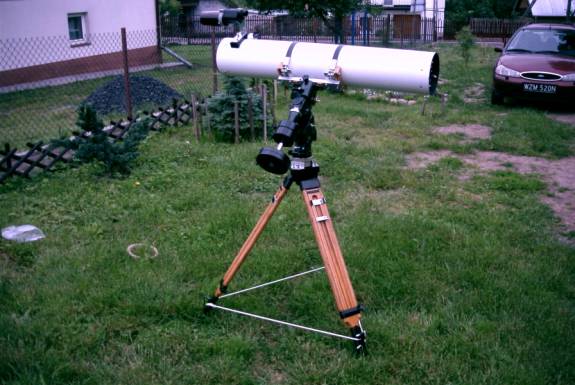
My Newtonian OTA attached to
the mount using standard dovetail adapter and custom made “tube rings” – rather
a length of 2mm thick 25mm wide aluminium tape and some pieces of oak wood:
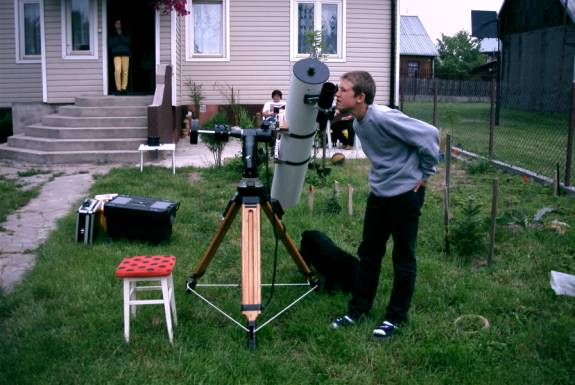
When assembled, the
telescope draw attention of neighbouring children – quite eager to have a look
at the sky even in daylight (see the front cover) and then at Mars late in the
night:
Final results
How to evaluate final
result? Well, try to set your scope up on jelly. And then move to concrete. I
still need to eliminate some play in the mount head, but the difference is impressive
already. Any vibrations at the eyepiece of my (rather heavy – 8 kg) Newtonian
are dampened within 1 – 1.5 seconds!
Drawbacks
There are two. First, the
hardwood tripod is substantially heavier than the aluminium one, it weights
around 15 kg in total. Second – at its lowers position, it is still about 25 cm
higher than the original tripod, so some people may have trouble to reach the
eyepiece of a Newtonian telescope in some positions if the tube is longer than
90 cm – and this is true in my case. A one-step ladder however cures this
problem, and overall improvement in stability is definitely worthwhile.
Furthermore, new, higher tripod is even more convenient for refractors!
I have a future plan to add
additional brace between the legs – mostly to prevent them for spreading too
far if the scope is set on a slippery surface. It will also support an
accessory tray, which will hold eyepieces, filters and power supply box (see
further description).
And what about the original
tripod? Well, it is not entirely hopeless. I can still use it if I only plan to
use the Mak scope, in particular to make it more portable for observing in the
field. Also, I plan to use some rainy weekend during this summer or autumn to
build a parallelogram for my 16 x 80 binoculars, and this would be a great
tripod to put it mount on.